Out of the box, Zendesk has a user import feature but it is limited when creating new users or updating existing ones. Here’s a quick comparison of what can be imported via the Admin screen versus the API:
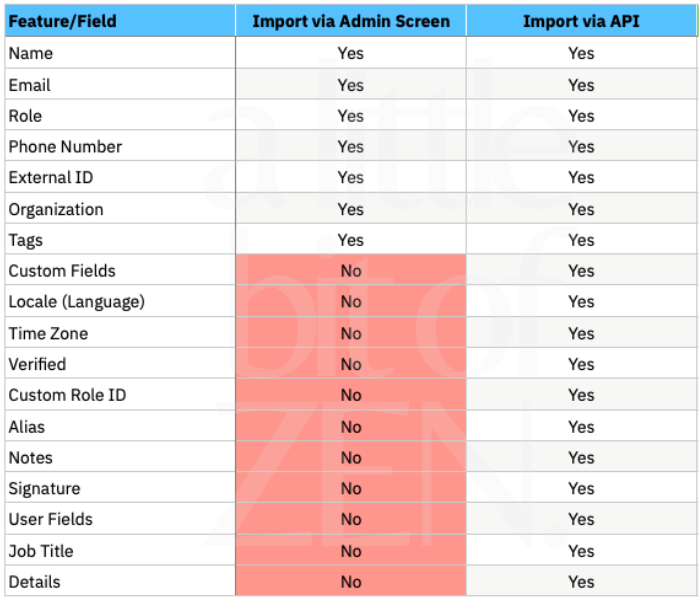
So what if you want to import common attributes such as language, time zone, or any other field in red without buying an app from the Marketplace?
This article will guide you through importing bulk users to your Zendesk instance with all of the available attributes in the API using only Google Sheets (free!). You’ll be importing users in under 15 minutes.
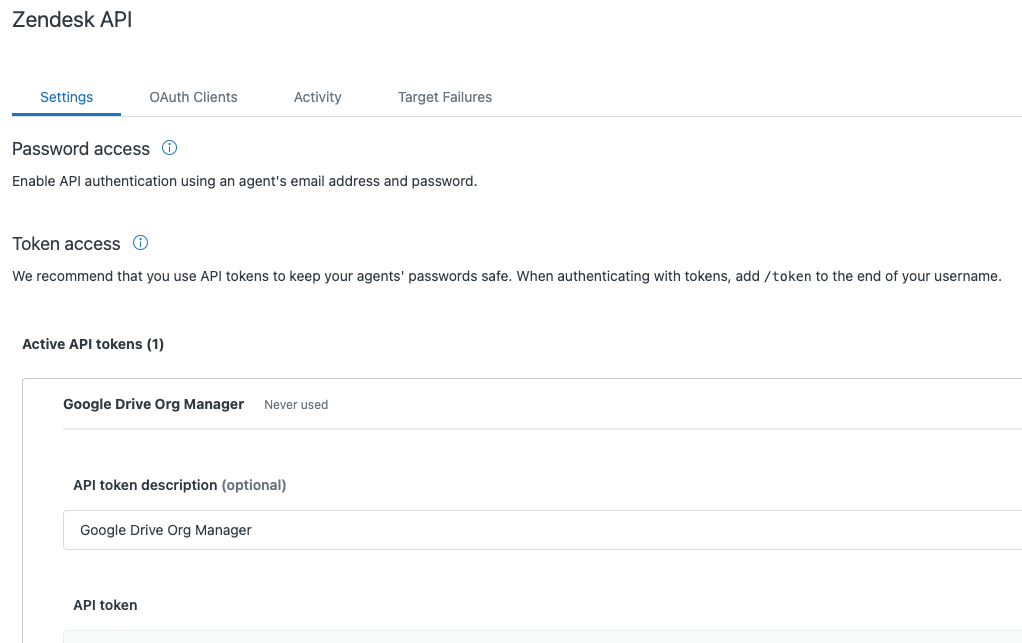
Step 1. Generate API Key
You’ll need an API key to allow script access to your Zendesk instance. You can revoke it later if you like.
- Open Zendesk Admin Center
- Navigate to Apps & Integrations > Zendesk API
- Click Add API Token
- Give it a descriptive name
- Copy the key and save it securely (e.g. password manager)
- Click Save. You’ll need this key later.
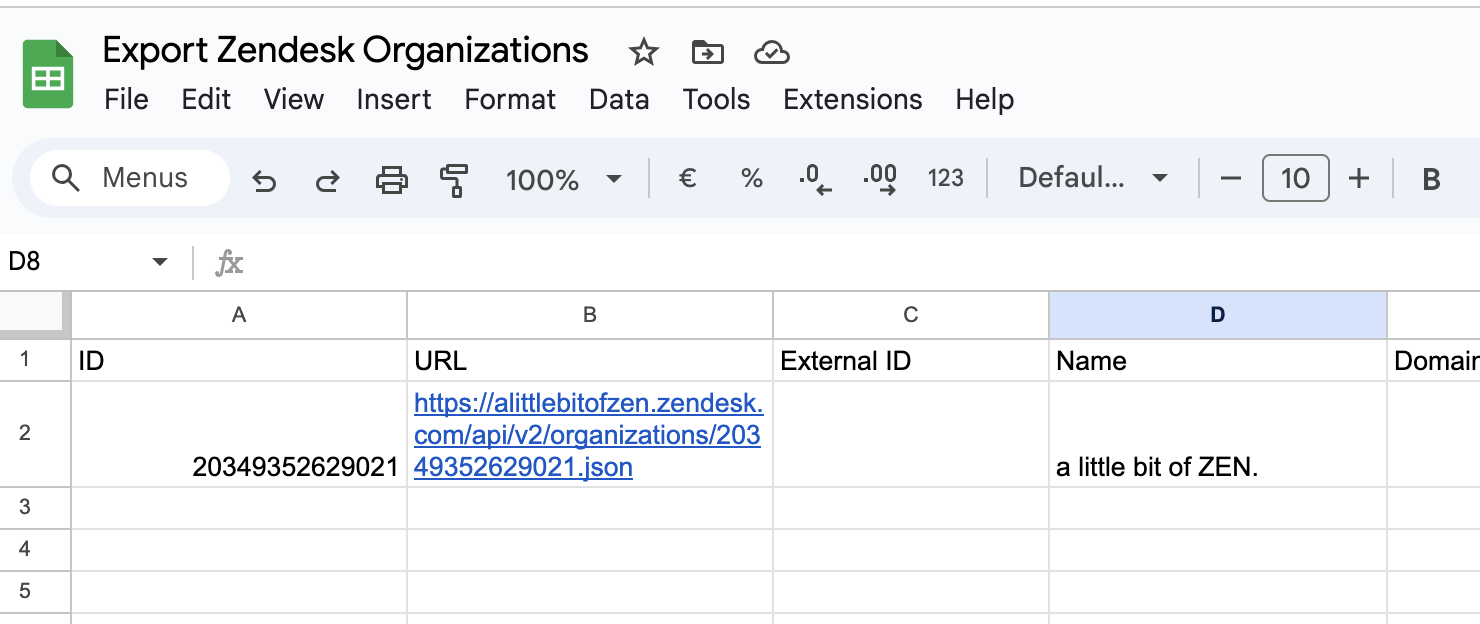
Step 2. Create Google Sheet
Two options:
- Download a CSV template: Zendesk_User_Import_Template and open it in Google Sheets
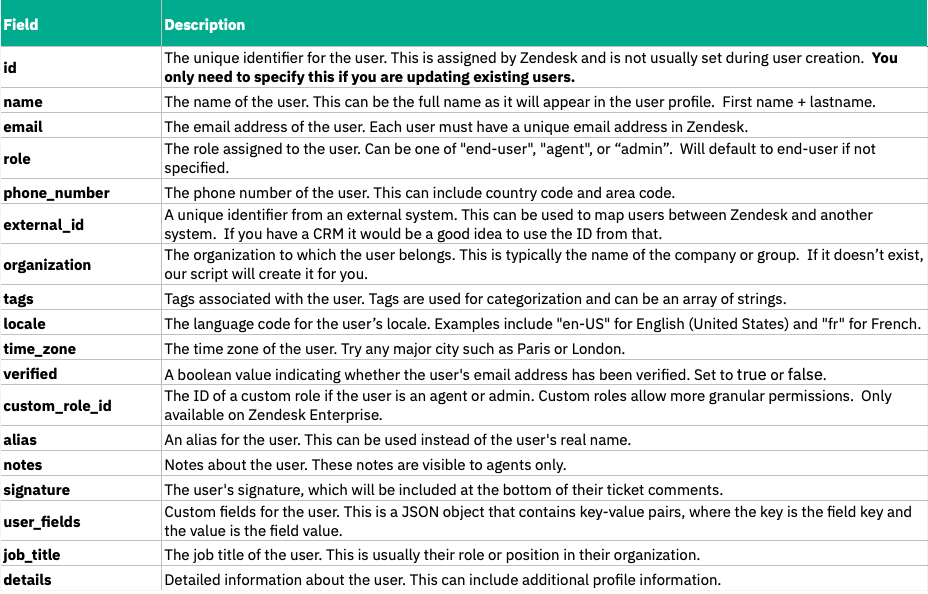
- Create your own Google Sheet from scratch using the field names in the table below
💁🏽 Pro Tip
Zendesk has a limit of 100 rows per import BUT our script has accounted for this, so you can paste in as many rows as you need.
Step 3. Create Your Script
- From within your Google Sheets file, click Extensions > Apps Script
- Give your project a name
- Copy the following script into the editor
function importUsersToZendesk() {
  var subdomain = 'your_subdomain'; // Replace with your Zendesk subdomain
  var email = 'your_email';         // Replace with your Zendesk email
  var apiToken = 'your_api_token';  // Replace with your Zendesk API token

  var sheet = SpreadsheetApp.getActiveSpreadsheet().getActiveSheet();
  var data = sheet.getDataRange().getValues();
  var headers = data[0];
  var users = [];
  var orgCache = {};

  for (var i = 1; i < data.length; i++) {
    var user = {};
    for (var j = 0; j < headers.length; j++) {
      if (data[i][j] !== '') {
        if (headers[j] === 'organization') {
          var orgName = data[i][j];
          if (!orgCache[orgName]) {
            var orgId = getOrCreateOrganization(subdomain, email, apiToken, orgName);
            orgCache[orgName] = orgId;
          }
          user.organization_id = orgCache[orgName];
        } else {
          user[headers[j]] = data[i][j];
        }
      }
    }
    users.push(user);
  }

  var batches = [];
  while (users.length) {
    batches.push(users.splice(0, 100));
  }

  batches.forEach(function(batch, index) {
    var url = 'https://' + subdomain + '.zendesk.com/api/v2/users/create_many.json';
    var options = {
      method: "post",
      headers: {
        "Authorization": "Basic " + Utilities.base64Encode(email + '/token:' + apiToken),
        "Content-Type": "application/json"
      },
      payload: JSON.stringify({ users: batch })
    };

    try {
      var response = UrlFetchApp.fetch(url, options);
      if (response.getResponseCode() == 201) {
        Logger.log('Batch ' + (index + 1) + ' imported successfully.');
      } else {
        Logger.log('Batch ' + (index + 1) + ' failed. Response: ' + response.getContentText());
      }
    } catch (e) {
      Logger.log('Error importing batch ' + (index + 1) + ': ' + e.message);
    }
  });

  Logger.log('User import process completed.');
}

function getOrCreateOrganization(subdomain, email, apiToken, orgName) {
  var url = 'https://' + subdomain + '.zendesk.com/api/v2/organizations/search.json?name=' + encodeURIComponent(orgName);
  var options = {
    method: "get",
    headers: {
      "Authorization": "Basic " + Utilities.base64Encode(email + '/token:' + apiToken),
      "Content-Type": "application/json"
    }
  };

  try {
    var response = UrlFetchApp.fetch(url, options);
    var responseData = JSON.parse(response.getContentText());

    if (responseData.organizations.length === 0) {
      var createUrl = 'https://' + subdomain + '.zendesk.com/api/v2/organizations.json';
      var createOptions = {
        method: "post",
        headers: {
          "Authorization": "Basic " + Utilities.base64Encode(email + '/token:' + apiToken),
          "Content-Type": "application/json"
        },
        payload: JSON.stringify({ organization: { name: orgName } })
      };

      var createResponse = UrlFetchApp.fetch(createUrl, createOptions);
      var createResponseData = JSON.parse(createResponse.getContentText());

      if (createResponse.getResponseCode() == 201) {
        Logger.log('Organization ' + orgName + ' created successfully.');
        return createResponseData.organization.id;
      } else {
        Logger.log('Failed to create organization ' + orgName + '. Response: ' + createResponse.getContentText());
        return null;
      }
    } else {
      Logger.log('Organization ' + orgName + ' already exists.');
      return responseData.organizations[0].id;
    }
  } catch (e) {
    Logger.log('Error checking/creating organization ' + orgName + ': ' + e.message);
    return null;
  }
}
4. Paste your script into the editor, overwriting anything already there
5. Replace ‘your_subdomain’ with your Zendesk subdomain (find it in Admin Center > Brand)
6. Replace ‘your_email’ with your Zendesk administrator email
7. Replace ‘your_api_token’ with the API token you created earlier
8. Click Save
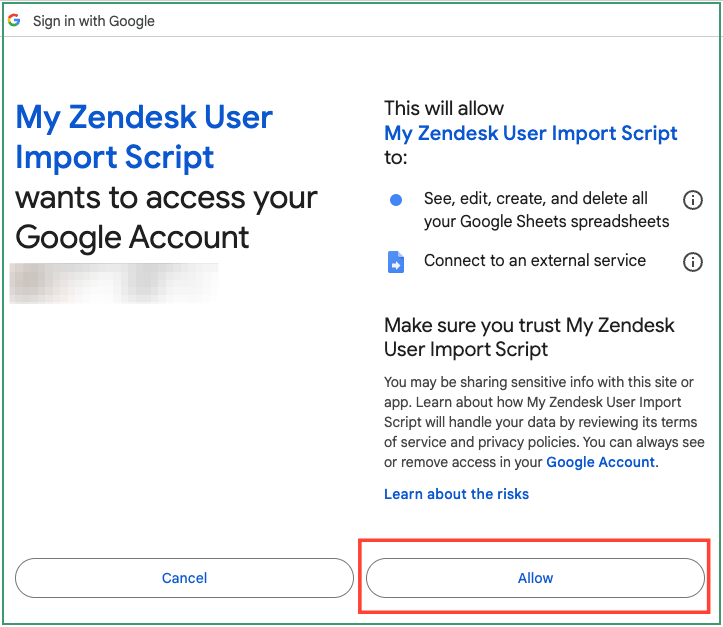
9. Click Run – you’ll be prompted to Review Permissions
10. Choose your Google account – authorize access for this script to connect Google Sheets with Zendesk
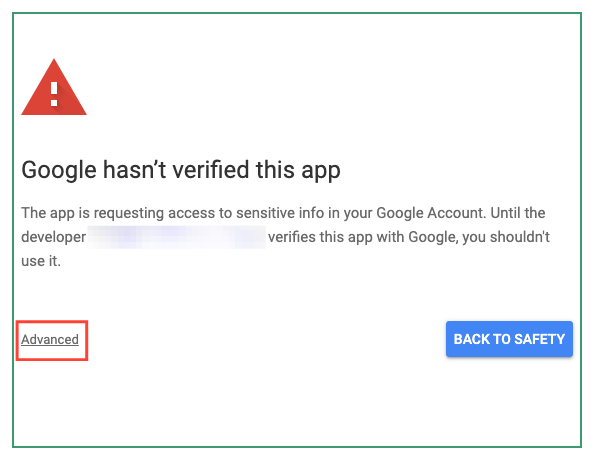
11. If you see a warning, click Advanced
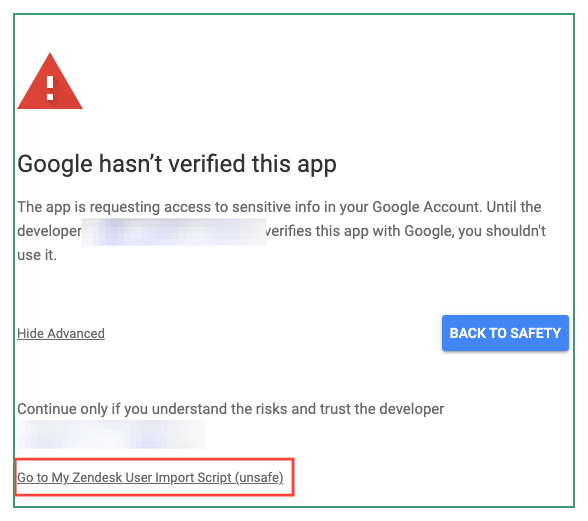
12. Click Go to My Zendesk User Import Script (unsafe) (or your project name) and then click Allow
13. Your script will now run and you should see an Execution Log beneath the script.

14. You can check the final status of the job by copying/pasting the URL from the log into a new browser window. Alternatively, switch to your Zendesk agent workspace and locate the new user(s).
Recap
Zendesk’s UI import is limited in the fields it can handle. To do a more comprehensive import, use this script with Google Sheets. It’s flexible, easy to follow, and saves you from buying third-party tools.